Saving measurements with our app
Please watch our tutorials on how to save measurements, the functions of the collection buttons and how to use the saving menu:
Step 1 - Create a collection
Collections are folders for you measurements (spectra). Create a collection or use a pre-existing one.
Step 2 - Connect to a machine
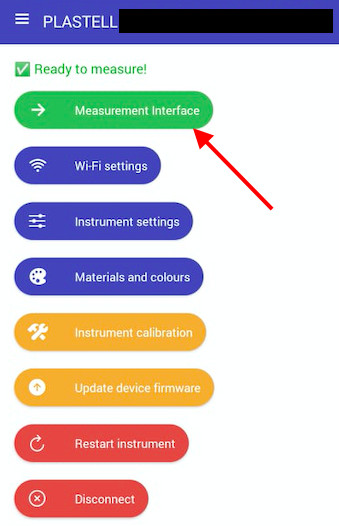
Connect to a machine and after you have successfully connected, select "Measurement interface".
Step 3 - Measure a sample and add it to your collection
For PlasTell:
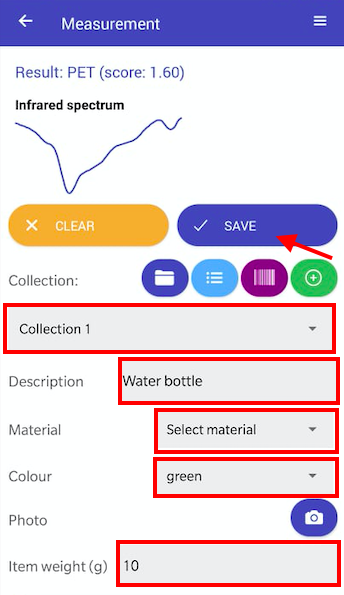
Measure your sample, the result of your measurement will appear on your device screen and your spectrometer screen.
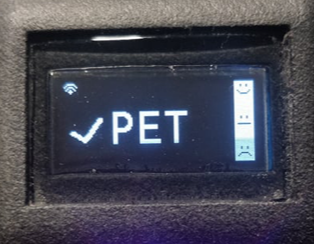
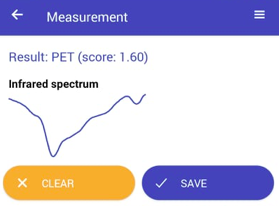


Select your desired collection and enter any other relevant information about the sample, such as the material or description.
Press "Save" - this uploads the measurement into our cloud where it is securely stored. Now you can measure further samples.
For FabriTell:
Measure your sample, the result of your measurement will appear on your device screen and your spectrometer screen.
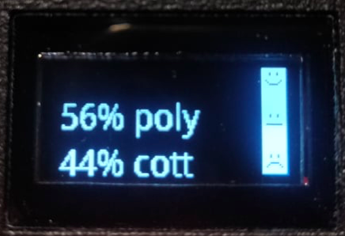
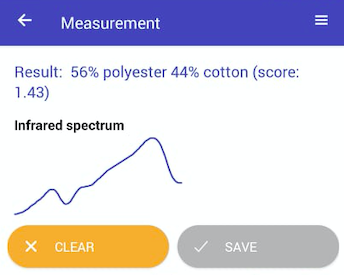


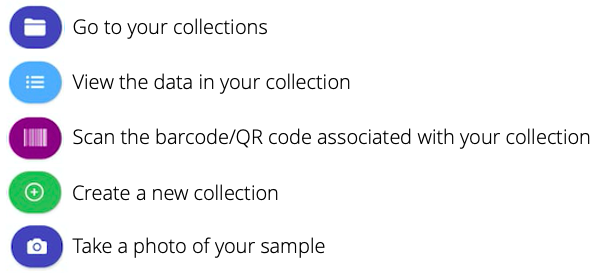
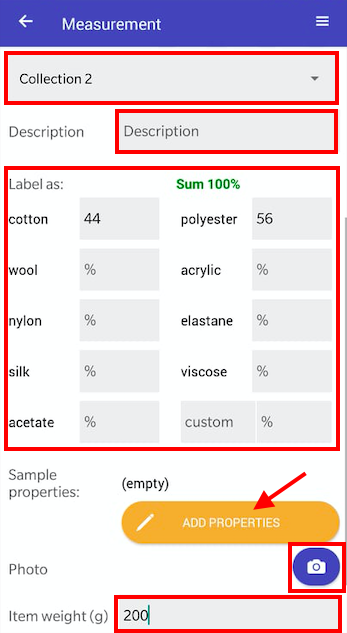
To save your measurement, pick the collection to which your data will be saved. A description of the icons you will see on your device is provided below.
For fabrics, you can enter a text description about your sample in the description box.
You can also enter the composition of your sample (for example, the composition found on clothes labels) as percentages. Note that the app will not let you save unless your total percentages entered add up to 100%.
A photo of your sample can be taken and stored with your measurement and information added by pressing the photo icon. You will be asked to give the app access to your device camera.
You can also add the weight of your sample.
Finally, you can provide extra details about your garment by selecting "Add properties". This is will be explained below.
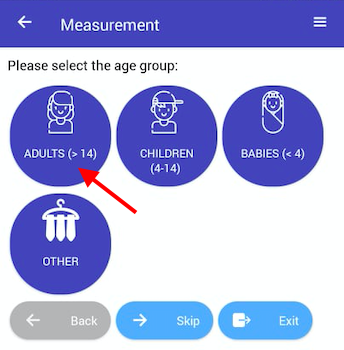
When you select "Add properties", you will be directed to a new page where you can select the age group associated with your scanned item of clothing.
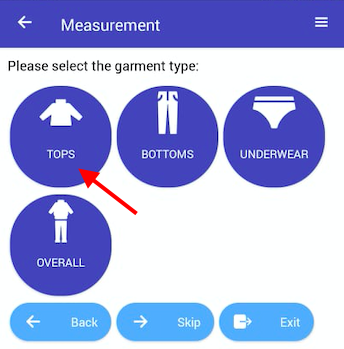
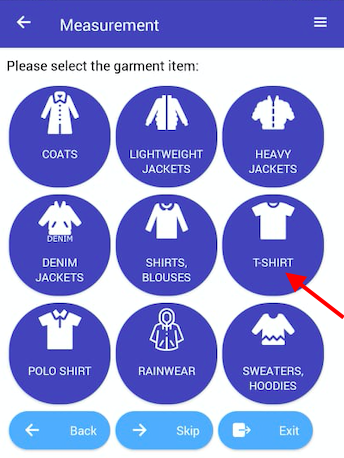
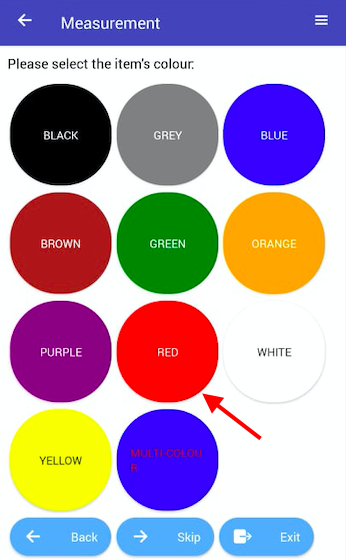
As an example, if we have a women's red T-shirt:
Select the "Adults (>14)" icon
Select the "Tops" icon
Select the "T-shirt" icon
Select the colour which is closest to your garment colour (for this example, red)
Check if there are any disruptors present - these would be non-fabric items present on your garment such as buttons or zippers.
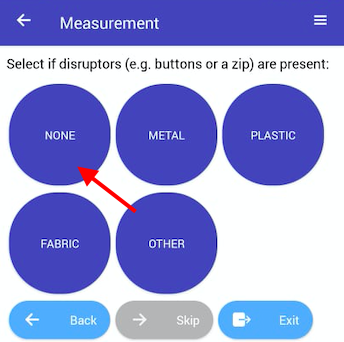
Once you input all of these descriptors, you will be taken back to the screen showing your measurement spectrum and any other data you have inputted. To save your measurement with all the descriptors, select "Save".
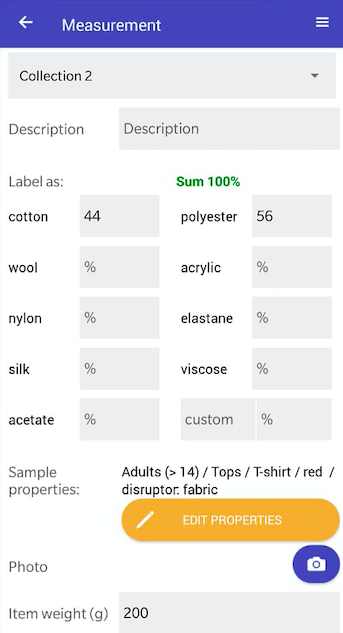
Note that you can save measurements without entering any/all of these descriptors as long as you select a collection.
Saving menu
We have added a few settings to make the saving of data more convenient - these are available from the "Saving menu". To bring it up, measure a sample then hold the Save button, as per the screenshot:
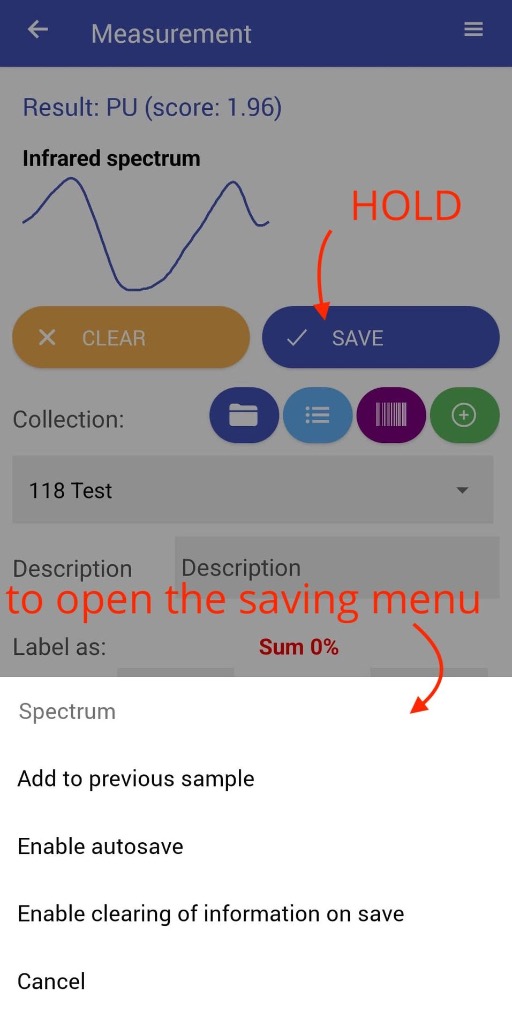
Then, you can choose from:
-
Add to previous sample - this saves the sample with the same (random) sample ID as the previous sample, so that you know it was the same sample
-
Enable (disable) autosave - this will enable saving every single spectrum the device measures while the app is connected
-
Enable (disable) clearing on save - this will delete all the sample information after a successful save
